recommended upload size of images firebase swift
Update note: Yusuf Tör updated this tutorial for iOS 14, Swift 5, Xcode 12 and MessageKit 3.6. Tom Elliott wrote the original.
It seems like every major app out at that place has a conversation characteristic, and yours should be no different! This Firebase tutorial volition evidence you how to add real-time chat to your app.
However, creating a chat tool can seem similar a daunting task. At that place are no native UIKit controls specifically designed for chat, and you need a server to coordinate and shop the conversations between users.
Fortunately, there are some great frameworks out in that location to assistance you:
- Firebase lets you synchronize existent-time data without writing a line of server lawmaking.
- MessageKit gives you lot a messaging UI that'due south on par with the native Messages app.
In this tutorial, y'all'll build RWRC, or Ray Wenderlich Relay Conversation, an bearding chat app. If y'all've used IRC or Slack, yous're already familiar with this sort of app.

Along the fashion, you'll learn how to:
- Authenticate anonymously with Firebase.
- Create multiple chat channels.
- Leverage MessageKit for a complete chat UI.
- Synchronize data in real-time with the Firestore database.
- Use Firebase Storage to send pictures.
Getting Started
Click Download Materials at the top or bottom of this tutorial to download the starter project.
Open the starter project and take a quick look around. The starter project contains a elementary dummy login screen that saves the credentials to UserDefaults. Information technology likewise has a few helper classes for sending data to Firebase and saving data to UserDefaults.
In the starter projection, you'll detect ChannelsViewController.swift, which listens to changes in a Firebase Firestore database and updates a table view whenever the user adds a new channel. You'll build a similar implementation to brandish conversation messages instead of channels.
You'll notice the Firebase SDK and MessageKit are already in the project as Swift Packages. These will automatically install when you open up the project.
Before you lot can run the app, you'll demand to configure Firebase.
Creating a Firebase Account
If y'all're new to Firebase, you'll need to create an account. Don't worry! It's like shooting fish in a barrel and complimentary.
Head to the Firebase signup site and create an account. So create and name a new Firebase projection chosen RWRC. Make sure that y'all disable support for Google Analytics as it won't be necessary for this tutorial.
In Xcode, click the target and change the Packet Identifier to whatever value yous similar. Then select a Team in the Signing section.
In the Projection Overview in Firebase, click iOS. You'll run across instructions to add Firebase to your iOS app:

Next, enter the app's bundle ID (the i you lot chose before in Xcode) and name (RWRC) into the form and click Annals app:

Download and add GoogleService-Info.plist to your project under the Supporting Files group every bit shown in the Firebase instructions. This file contains the configuration information y'all demand to integrate Firebase with your app:

Note: Exercise simply steps one and two of the instructions. The rest is already done in the starter project and your app will crash if you duplicate the steps.
At present build and run. You lot'll run across the following:

That's a good start, but right now the application login screen doesn't really exercise anything. You'll now claw that up to Firebase.
Enabling Anonymous Hallmark
Firebase lets users log in through email or social accounts. Notwithstanding, information technology tin also authenticate users anonymously, giving them unique identifiers without knowing their personally identifiable information.
To set up anonymous authentication, open the Firebase console for the app you made before. Select Hallmark on the left and click Get started:

Then select Anonymous. Toggle Enable and click Save:

Simply like that, you enabled super secret stealth mode! Okay, so information technology's just anonymous authentication. But hey, it'southward however cool. :]

It's now time to set up the login within the app itself.
Logging In
Open LoginViewController.swift. Under import UIKit, add:
import FirebaseAuth To log in to conversation, the app volition need to cosign using the Firebase authentication service. Add together the following code to the end of signIn():
Auth.auth().signInAnonymously() This method asynchronously logs into Firebase anonymously. If the device has already signed in, then the existing user is signed in, otherwise a new user is created. In one case the sign in has completed Firebase posts the AuthStateDidChange notification that AppController is listening for. AppController updates the root view controller for you when the notification fires.
Build and run. Enter a display name and tap Get Started:
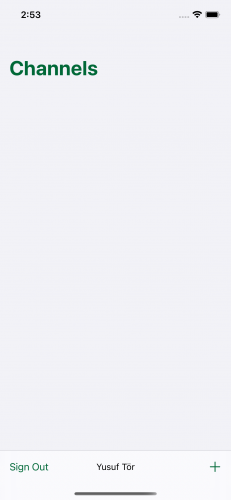
Once the user signs in, they automatically navigate to the ChannelsViewController. They'll encounter a list of electric current channels and have the option to create new channels. The tabular array has a single department to display all bachelor channels.
At the bottom, they'll see a toolbar with a sign-out button, a label displaying their name and an add button.
Before yous dive into sending messages in existent-fourth dimension, take a minute to acquire about the databases Firebase has to offer.
Choosing a Firebase Database
Firebase comes with two NoSQL JSON databases: Firestore and Realtime Database.
Initially, Firebase only had Realtime Database, an efficient, low-latency database that stores data in i big JSON tree.
However, this wasn't the best solution for all use cases. So the Firebase team improved on the success of Realtime Database with a new, more intuitive data model called Firestore.
Firestore stores information as documents that contain a set of key-value pairs. It organizes these documents into collections. Each document can have sub-collections.
Each database has strengths and weaknesses.
The Realtime Database:
Strengths
- Supports user presence, then you lot tin tell when a user is online or offline.
- Has extremely low latency.
- Charges for bandwidth and storage simply not for operations performed in the database.
- Scales to 200k concurrent connections.
Weaknesses
- Has no multi-region back up. Information is available in regional configurations just.
- Has limited sorting and filtering functionality.
The Firestore database:
Strengths
- More structured than the Realtime Database and can perform more complex queries on the data.
- Designed to scale better than the Realtime Database. The scaling limit is currently around one million concurrent connections.
- Has multiple data centers storing data in distinct regions and can support multi-regional configurations.
- Charges primarily on operations performed in the database and, at a lower rate, bandwidth and storage.
Weaknesses
- Doesn't allow documents to update at a rate greater than one time per second.
- Doesn't support user presence.
For this tutorial, you lot'll use Firestore equally your database. Still, in a production chat app with lots of reads and writes to the database, you may choose the Realtime Database to reduce costs.
You can also use both the Firestore and Realtime Database inside your app. For more information about these databases, accept a wait at Firebase's documentation.
Now that you know a little about the Firebase database, it is time to larn about the structure of the data yous'll shop in the database.
Firebase Data Construction
Y'all learned that Firestore is a NoSQL JSON data store, but what is that exactly? Essentially, everything in Firestore is a JSON object, and each cardinal of this JSON object has its ain URL.
Here'southward a sample of how your data could expect as a JSON object:
{ "channels": [{ "MOuL1sdbrnh0x1zGuXn7": { // channel id "name": "Puppies", "thread": [{ "3a6Fo5rrUcBqhUJcLsP0": { // message id "content": "Wow, that'due south so beautiful!", "created": "April 12, 2022 at 10:44:11 PM UTC-five", "senderId": "YCrPJF3shzWSHagmr0Zl2WZFBgT2", "senderName": "naturaln0va", }, "4LXlVnWnoqyZEuKiiubh": { // message id "content": "Yes he is.", "created": "April 12, 2022 at ten:40:05 PM UTC-5", "senderId": "f84PFeGl2yaqUDaSiTVeqe9gHfD3", "senderName": "lumberjack16", }, }] }, }] } You lot can see hither there is a principal JSON object with a single key called channels. The channels value is an array of objects. These channel objects are keyed by an identifier and contain a name & a thread. The thread is an array of objects, each of which is a single message containing the bulletin in the content field, a created date and the identifier and name of the message'due south sender.
Firestore favors a denormalized information structure, and then it'south okay to include senderId and senderName for each message item. A denormalized data structure ways you'll duplicate a lot of data, just the upside is faster data retrieval.
That data structure looks good then it's time to crack on with setting upward the app to handle those chat threads!
Setting Up the Chat Interface
MessageKit is a souped-up UICollectionViewController customized for chat, so yous don't have to create your own! :]
In this section of the tutorial, you'll focus on four things:
- Handling input from the input bar
- Creating message data
- Styling bulletin bubbles
- Removing avatar back up
Almost everything you lot need to do requires you to override methods. MessageKit provides the MessagesDisplayDelegate, MessagesLayoutDelegate and MessagesDataSource protocols, so you only demand to override the default implementations.
Note: For more information on customizing and working with MessagesViewController, check out the total documentation.
Open ChatViewController.swift. At the top of ChatViewController, define the following properties:
private var messages: [Message] = [] private var messageListener: ListenerRegistration? The messages array is the information model, and the messageListener is a listener which handles make clean up.
At present yous can start configuring the data source. To a higher place the InputBarAccessoryViewDelegate section, add:
// Mark: - MessagesDataSource extension ChatViewController: MessagesDataSource { // one func numberOfSections( in messagesCollectionView: MessagesCollectionView ) -> Int { render letters.count } // 2 func currentSender() -> SenderType { return Sender(senderId: user.uid, displayName: AppSettings.displayName) } // three func messageForItem( at indexPath: IndexPath, in messagesCollectionView: MessagesCollectionView ) -> MessageType { return messages[indexPath.department] } // four func messageTopLabelAttributedText( for message: MessageType, at indexPath: IndexPath ) -> NSAttributedString? { let proper name = message.sender.displayName return NSAttributedString( string: name, attributes: [ .font: UIFont.preferredFont(forTextStyle: .caption1), .foregroundColor: UIColor(white: 0.3, blastoff: one) ]) } } This implements the MessagesDataSource protocol from MessageKit. In that location's a bit going on here:
- Each message takes upward a section in the collection view.
- MessageKit needs to know name and ID for the logged in user. You tell it that by giving it something befitting to
SenderType. In your case, information technology'southward an instance ofSender. - Your
Messagemodel object conforms toMessageTypeand so you render the bulletin for the given index path. - The final method returns the attributed text for the name above each message bubble. Yous can alter the text you're returning here to your liking, but these are some good defaults.
Build and run. Add a aqueduct named Cooking and then navigate to it. Information technology'll look similar this:

And so far, then good. Next, you'll need to implement a few more delegates before y'all kickoff sending messages.
Setting Up the Display and Layout Delegates
Now that you've seen your new awesome chat UI, y'all probably want to start displaying messages. Only earlier y'all exercise that, you have to have care of a few more things.
Still in ChatViewController.swift, add the following section below the MessagesDisplayDelegate department:
// MARK: - MessagesLayoutDelegate extension ChatViewController: MessagesLayoutDelegate { // 1 func footerViewSize( for message: MessageType, at indexPath: IndexPath, in messagesCollectionView: MessagesCollectionView ) -> CGSize { return CGSize(width: 0, height: 8) } // ii func messageTopLabelHeight( for message: MessageType, at indexPath: IndexPath, in messagesCollectionView: MessagesCollectionView ) -> CGFloat { return 20 } } This lawmaking:
- Adds a fiddling bit of padding on the lesser of each bulletin to improve the conversation's readability.
- Sets the height of the top label above each message. This label will agree the sender'southward proper name.
The messages displayed in the drove view are simply images with text overlaid. There are ii types of messages: outgoing and incoming. Outgoing messages display on the right and incoming messages on the left.
In ChatViewController, replace MessagesDisplayDelegate with:
// MARK: - MessagesDisplayDelegate extension ChatViewController: MessagesDisplayDelegate { // 1 func backgroundColor( for message: MessageType, at indexPath: IndexPath, in messagesCollectionView: MessagesCollectionView ) -> UIColor { render isFromCurrentSender(message: bulletin) ? .primary : .incomingMessage } // 2 func shouldDisplayHeader( for message: MessageType, at indexPath: IndexPath, in messagesCollectionView: MessagesCollectionView ) -> Bool { return false } // three func configureAvatarView( _ avatarView: AvatarView, for message: MessageType, at indexPath: IndexPath, in messagesCollectionView: MessagesCollectionView ) { avatarView.isHidden = true } // 4 func messageStyle( for message: MessageType, at indexPath: IndexPath, in messagesCollectionView: MessagesCollectionView ) -> MessageStyle { let corner: MessageStyle.TailCorner = isFromCurrentSender(message: bulletin) ? .bottomRight : .bottomLeft return .bubbleTail(corner, .curved) } } Taking the code above footstep-past-pace:
- For a given message, y'all check to see if it'south from the current sender. If it is, you return the app'southward primary green color. If non, you return a muted gray color. MessageKit uses this colour for the background image of the message.
- You render
falseto remove the header from each message. You lot could apply this to display thread-specific data, such as a timestamp. - Then you hide the avatar from the view as that is not necessary in this app.
- Finally, based on who sent the message, you choose a corner for the tail of the message bubble.
Although the avatar is no longer visible, it however leaves a bare infinite in its place.
Below setUpMessageView() add:
private func removeMessageAvatars() { guard permit layout = messagesCollectionView.collectionViewLayout equally? MessagesCollectionViewFlowLayout else { return } layout.textMessageSizeCalculator.outgoingAvatarSize = .zero layout.textMessageSizeCalculator.incomingAvatarSize = .goose egg layout.setMessageIncomingAvatarSize(.zero) layout.setMessageOutgoingAvatarSize(.zero) allow incomingLabelAlignment = LabelAlignment( textAlignment: .left, textInsets: UIEdgeInsets(top: 0, left: fifteen, bottom: 0, correct: 0)) layout.setMessageIncomingMessageTopLabelAlignment(incomingLabelAlignment) permit outgoingLabelAlignment = LabelAlignment( textAlignment: .right, textInsets: UIEdgeInsets(summit: 0, left: 0, bottom: 0, right: fifteen)) layout.setMessageOutgoingMessageTopLabelAlignment(outgoingLabelAlignment) } This lawmaking removes the blank space left for each hidden avatar and adjusts the inset of the acme label higher up each message.
Side by side, add the following to the lesser of viewDidLoad():
removeMessageAvatars() Finally, set the relevant delegates. Add the post-obit to the bottom of setUpMessageView():
messageInputBar.delegate = self messagesCollectionView.messagesDataSource = self messagesCollectionView.messagesLayoutDelegate = self messagesCollectionView.messagesDisplayDelegate = self Build and run. Verify that you can navigate to one of your channels.
Believe it or not, that's all it takes to configure a MessagesViewController to display letters!
Well, it would be more exciting to meet some letters, wouldn't it? Time to get this chat started!
Creating Messages
In ChatViewController, below viewDidLoad(), add:
// Marker: - Helpers private func insertNewMessage(_ message: Message) { if letters.contains(bulletin) { return } letters.append(message) messages.sort() permit isLatestMessage = messages.firstIndex(of: bulletin) == (messages.count - ane) allow shouldScrollToBottom = messagesCollectionView.isAtBottom && isLatestMessage messagesCollectionView.reloadData() if shouldScrollToBottom { messagesCollectionView.scrollToLastItem(animated: true) } } This method adds a new message. It first makes certain the message isn't already present, so adds it to the collection view. Then, if the new message is the latest and the collection view is at the bottom, it scrolls to reveal the new message.
Now add the post-obit underneath viewDidLoad():
override func viewDidAppear(_ animated: Bool) { super.viewDidAppear(animated) let testMessage = Message( user: user, content: "I dear pizza; what is your favorite kind?") insertNewMessage(testMessage) } This adds a simple test message when the view appears.
Build and run. You'll see your message announced in the chat view:

Smash! That's ane expert-looking chat app! Time to make information technology piece of work for real with Firebase.
Sending Messages
Offset, delete viewDidAppear(_:) to remove the exam message in ChatViewController. Then, add the following backdrop at the top of the class:
private let database = Firestore.firestore() individual var reference: CollectionReference? Below viewDidLoad(), add:
individual func listenToMessages() { guard let id = aqueduct.id else { navigationController?.popViewController(animated: true) return } reference = database.collection("channels/\(id)/thread") } First the id on the channel is checked for zero considering y'all might not accept synced the channel withal. It shouldn't exist possible to send messages if the channel doesn't exist in Firestore all the same, and so returning to the aqueduct listing makes the most sense. So the reference is fix to reference the thread array on the channel in the database.
So, in viewDidLoad(), add together the following below super.viewDidLoad():
listenToMessages() Next, add the following method to the elevation of the Helpers department:
private func save(_ message: Message) { reference?.addDocument(data: message.representation) { [weak self] error in baby-sit permit self = self else { return } if permit mistake = error { print("Error sending bulletin: \(error.localizedDescription)") render } self.messagesCollectionView.scrollToLastItem() } } This method uses the reference you simply set up up. addDocument on the reference takes a dictionary with the keys and values representing that data. The message data construction implements DatabaseRepresentation, which defines a lexicon property to fill out.
Back in ChatViewController.swift, add together the following delegate method inside InputBarAccessoryViewDelegate:
func inputBar( _ inputBar: InputBarAccessoryView, didPressSendButtonWith text: String ) { // 1 let message = Message(user: user, content: text) // 2 save(message) // 3 inputBar.inputTextView.text = "" } Here you:
- Create a
Bulletinfrom the contents of the input bar and the current user. - Save the message to the Firestore database.
- Clear the input bar'south text view later you send the message, gear up for the user to send the next message.
Side by side, you lot need to create a database.
Creating the Database
Open your app's Firebase console. Click Firestore Database on the left and Create database:

When you lot create a database for a real-world setup, y'all'll want to configure security rules but they're non necessary for this tutorial. Select Start in exam style and click Side by side. Y'all tin read more virtually security rules in the Firestore documentation.

You can configure Firestore to shop information in dissimilar regions beyond the globe. For now, leave the location as the default setting and click Enable to create your database:

Build and run. Select a aqueduct and send a message.
Yous'll see the messages appear in the dashboard in real-fourth dimension. Y'all may demand to refresh the folio if you don't see any updates when you add the first message:

High 5! You lot're saving messages to Firestore like a pro. The messages don't appear on the screen, merely you'll accept care of that next.
Synchronizing the Data Source
In ChatViewController, add the post-obit below insertNewMessage(_:):
private func handleDocumentChange(_ change: DocumentChange) { guard let message = Message(document: change.document) else { return } switch change.type { case .added: insertNewMessage(bulletin) default: break } } For simplicity in this tutorial, the only modify type you handle in the switch statement is added.
Side by side, add together the following lawmaking to the bottom of listenToMessages():
messageListener = reference? .addSnapshotListener { [weak self] querySnapshot, fault in baby-sit let cocky = cocky else { return } baby-sit let snapshot = querySnapshot else { print(""" Mistake listening for aqueduct updates: \ \(error?.localizedDescription ?? "No fault") """) return } snapshot.documentChanges.forEach { change in self.handleDocumentChange(change) } } Firestore calls this snapshot listener whenever there's a change to the database.
You need to clean upwards that listener. So add this above viewDidLoad():
deinit { messageListener?.remove() } Build and run. You'll see any messages sent earlier along with any new ones yous enter:

Congrats! You lot have a real-fourth dimension chat app! Now it's time to add one final finishing bear on.
Sending Images
To send images, you'll follow mostly the same principle as sending text with one fundamental divergence. Rather than storing the image data directly with the message, you'll apply Firebase Storage, which is better suited to storing large files like sound, video or images.
Add the post-obit at the top of ChatViewController.swift:
import Photos So to a higher place the Helpers department add together:
// Marking: - Actions @objc private func cameraButtonPressed() { permit picker = UIImagePickerController() picker.delegate = self if UIImagePickerController.isSourceTypeAvailable(.camera) { picker.sourceType = .camera } else { picker.sourceType = .photoLibrary } present(picker, animated: true) } This method presents an prototype picker controller to let the user select an image.
So, add the following code below removeMessageAvatars():
private func addCameraBarButton() { // 1 let cameraItem = InputBarButtonItem(type: .system) cameraItem.tintColor = .main cameraItem.image = UIImage(named: "camera") // ii cameraItem.addTarget( cocky, action: #selector(cameraButtonPressed), for: .primaryActionTriggered) cameraItem.setSize(CGSize(width: 60, height: thirty), animated: false) messageInputBar.leftStackView.alignment = .centre messageInputBar.setLeftStackViewWidthConstant(to: 50, blithe: false) // 3 messageInputBar .setStackViewItems([cameraItem], forStack: .left, animated: false) } Here yous:
- Create a new
InputBarButtonItemwith a tint colour and an image. - Connect the new push button to
cameraButtonPressed(). - Add the item to the left side of the message bar.
Next, add the following to the bottom of viewDidLoad():
addCameraBarButton() Sending a photo message is a petty different than sending a plain text message. Uploading a photo to Firebase Storage may accept a couple of seconds, perhaps longer if the network connectedness is poor.
Rather than blocking the user interface during this time, which volition brand your app feel slow, you'll start sending the message and disable the photographic camera message bar item.
At the elevation of ChatViewController add together:
private var isSendingPhoto = false { didSet { messageInputBar.leftStackViewItems.forEach { detail in guard permit item = item equally? InputBarButtonItem else { return } particular.isEnabled = !self.isSendingPhoto } } } private let storage = Storage.storage().reference() isSendingPhoto updates the camera button to be enabled but when there is no photograph sending in progress. storage is a reference to the root of Firebase Storage.
Then, add this method to the bottom of the Helpers department:
private func uploadImage( _ image: UIImage, to aqueduct: Channel, completion: @escaping (URL?) -> Void ) { guard let channelId = channel.id, let scaledImage = image.scaledToSafeUploadSize, let information = scaledImage.jpegData(compressionQuality: 0.4) else { return completion(nada) } allow metadata = StorageMetadata() metadata.contentType = "epitome/jpeg" allow imageName = [UUID().uuidString, String(Date().timeIntervalSince1970)] .joined() let imageReference = storage.child("\(channelId)/\(imageName)") imageReference.putData(information, metadata: metadata) { _, _ in imageReference.downloadURL { url, _ in completion(url) } } } This method uploads an paradigm to the specified channel in the Firebase Storage.
Below uploadImage(_:to:completion:), add:
private func sendPhoto(_ image: UIImage) { isSendingPhoto = true uploadImage(image, to: channel) { [weak cocky] url in guard permit self = self else { render } self.isSendingPhoto = faux guard let url = url else { return } var message = Bulletin(user: self.user, prototype: paradigm) message.downloadURL = url self.save(message) self.messagesCollectionView.scrollToLastItem() } } This method kickoff updates isSendingPhoto to update the UI. Then it kicks off the upload and once the photo upload completes and returns the URL to that photo, it saves a new message with that photo URL to the database.
Earlier y'all can use sendPhoto(_:), y'all need to add together some paradigm picker delegate methods. To UIImagePickerControllerDelegate add:
func imagePickerController( _ picker: UIImagePickerController, didFinishPickingMediaWithInfo info: [UIImagePickerController.InfoKey: Any] ) { picker.dismiss(blithe: truthful) // one if let nugget = info[.phAsset] as? PHAsset { let size = CGSize(width: 500, pinnacle: 500) PHImageManager.default().requestImage( for: asset, targetSize: size, contentMode: .aspectFit, options: zip ) { upshot, _ in baby-sit let prototype = result else { return } self.sendPhoto(prototype) } // 2 } else if let image = info[.originalImage] every bit? UIImage { sendPhoto(image) } } func imagePickerControllerDidCancel(_ picker: UIImagePickerController) { picker.dismiss(animated: true) } These 2 methods handle cases when the user either selects an image or cancels the choice process. When choosing an image, the user can either get i from the photograph library or have an image straight with the photographic camera.
Here'southward a breakdown:
- If the user selected an asset, you request to download it from the user's photo library at a stock-still size. Once information technology's successfully retrieved, yous send information technology.
- If at that place'south an original image in the info dictionary, ship that. You don't demand to worry about the original image being too large because the storage helper handles resizing the image for you lot. Look at UIImage+Additions.swift for the resizing implementation.
Nearly there! Y'all've gear up your app to save the prototype data to Firebase Storage and relieve the URL to the message data. But you haven't updated the app to display those photos however.
Time to prepare that.
Displaying Photos in Threads
To the bottom of the Helpers section, add:
private func downloadImage( at url: URL, completion: @escaping (UIImage?) -> Void ) { let ref = Storage.storage().reference(forURL: url.absoluteString) let megaByte = Int64(ane * 1024 * 1024) ref.getData(maxSize: megaByte) { data, _ in guard allow imageData = data else { completion(nil) return } completion(UIImage(information: imageData)) } } This method asynchronously downloads an prototype at the specified path from Firebase Storage.
Next notice handleDocumentChange(_:) and alter the variable in the guard from a constant to a variable:
baby-sit var bulletin = Message(document: change.certificate) else { return } Then, in handleDocumentChange(_:), replace the content of the .added instance with:
if let url = message.downloadURL { downloadImage(at: url) { [weak cocky] paradigm in baby-sit let self = self, let image = paradigm else { return } bulletin.epitome = paradigm self.insertNewMessage(message) } } else { insertNewMessage(bulletin) } Now build and run the app. Tap the little camera icon and send a photo message in your conversation. Notice how the camera icon isn't enabled when your app saves the photograph information to Firebase Storage.

Kaboom! You made a big, bad, existent-time photo and text sending chat app.
Grab your favorite potable. You earned it!
Where to Go From Here?
Click Download Materials at the top or lesser of this tutorial to download the completed project.
You now know the nuts of Firestore and MessageKit. Only there'due south plenty more you can practice, including one-to-one messaging, social authentication and avatar display.
To take this app fifty-fifty further, take a look at the Firebase iOS documentation. You can too take a look at our 22 part video form on First Firebase!
I hope you've enjoyed this Firebase tutorial. If y'all have any questions, feel free to leave them in the non-anonymous all the same avatar-enabled give-and-take below! :]
Source: https://www.raywenderlich.com/22067733-firebase-tutorial-real-time-chat
Post a Comment for "recommended upload size of images firebase swift"